Social Icons

Pages

Featured Posts

make money

Saturday, 21 June 2014

make money with odesk

Hi all,

While there are a lot of reviews comparing various freelancing websites, few do it from the perspective of a Pakistani. I have taken the time out to do a little bit of research to identify which website is most suitable for us, in terms of cost and payment methods.

There are a number of freelancing websites out there that allow Pakistani workers to work on projects and then get paid on them. However, a lot of Pakistanis have problems receiving payments from abroad because we cannot have a Paypal account in Pakistan and relying on the postal system to receive checks via snail mail is not a preferred option.

This series will talk about the pros and cons of the major online freelancing marketplaces from our perspective. The next website we will be looking at is: 
 
ODESK

oDesk is amongst the leading online freelancing marketplaces on the internet today. It boasts hosting the more online work than anywhere else on the web, with over 1 million jobs posted and contractors earning more than $220 million in 2011 alone. 
 
oDesk is completely free to join, and it is free to apply for projects as well. However, oDesk users must go through several stages of verification before they can post unlimited bids at one time. New users who do not take any verification tests can only send out two job applications at a time. 
 
oDesk takes its Pakistani community very seriously. They have several payment options that are well suited to Pakistanis. Besides this, they have a dedicated sub-forum for Pakistani employers and contractors to discuss their issues and exchange ideas. 

There are a number of payment methods for Pakistani contractors.
 
 
Wire Transfer (PKR) is a relatively new payment method introduced by oDesk. It is adirect bank transfer from oDesk to your local PKR bank account in Pakistan. At the moment, only 11 banks are eligible for this transfer. According to the oDesk website, these include: 
  • Habib Bank Ltd.
  • National Bank of Pakistan
  • United Bank Ltd.
  • MCB Bank Ltd.
  • Allied Bank Ltd.
  • Bank al Falah Ltd.
  • Habib Metropolitan Bank Ltd.
  • Bank of Punjab Ltd.
  • KASB Bank Ltd.
  • JS bank Ltd.
  • Dubai Islamic Bank Ltd.
oDesk charges a flat rate of $4.99 per withdrawal, and they offer the first Wire Transferto Pakistanis for free. The exchange rates they offer are also competitive, and local bank charges are minimized because all transactions are occurring in PKR. The exact time it takes for the wire transfer to be completed is uncertain, but many people believe time maximum time a transfer can take is approximately ten business days.


Payoneer is reliable and quick but it can end up being quite expensive. They issue aprepaid MasterCard debit card to people who can then use it to make electronic purchases at any place that accepts MasterCard, or withdraw it at ATM machines which accept MasterCard (in Pakistan, these include Standard Chartered Bank, Faysal Bank* and Muslim Commercial Bank).
Payoneer charges $24.99 as a one time activation fee that Pakistanis must pay, as opposed to a $9.99 fee for some other countries.
 
Source: www.payoneer.com
 
oDesk charges $2.00 for each payment you make to your Payoneer card, and Payoneer charges $2 to load it ($5 if you want to load it instantly). Otherwise it can take a few business days. Payoneer also has a monthly fee of $3 ($1 if you have more than three transactions, either through ATM or purchasing from shops etc in the previous month) but this is not deducted from your account if you do not have sufficient money there during the course of the month; i.e. your Payoneer account can never become negative. Besides this, there is a $2.15 fee for each ATM withdrawal you make. To top it all off, you get a poor exchange rate in Pakistan. The exchange rate is Rs.90/$ but our banks only give Rs. 87/$. This amount can build up if you are withdrawing a lot of money.


Skrill, more commonly known as Moneybookers, transfers money to your Skrill account for $1.00, whereas Skrill charges EUR1.80 per withdrawal. Moreover, a rate of 1.99% has been applied for currency converssion by Skrill.

Moneybookers had a fantastic reputation amongst Pakistani contractors until recently, when there were widespread complaints of additional fees, delays and missing money with their services over the past couple of months. Skrill has undergone several internal changes, which have reduced its credibility in the eyes of many Pakistani contractors.  

Wednesday, 18 June 2014

install windows drivers automatically

                                        download

How does Driver Easy work?

Driver Easy Main Screen
Scanning
Download and install Driver Easy into your computer, launch Driver Easy, and Click "Scan Now" button to scan your computer
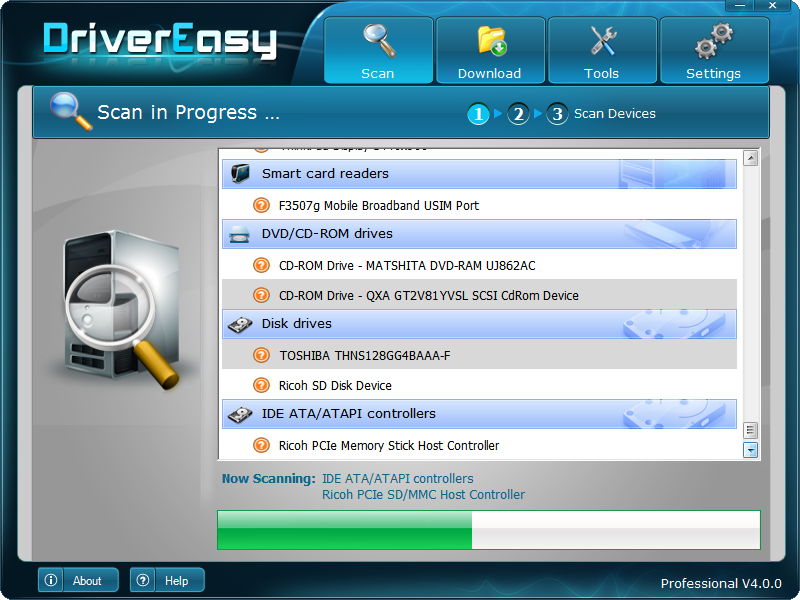
Driver Easy will automatically scan and analyze your hardware devices.
Result
Download Driver
Driver Easy will find all unknown and out-of-date drivers. Click "Get Drivers" button to get the latest drivers.
Driver Easy will automatically scan and analyze your hardware devices.
Tools

Driver Easy Professional version allow you to easily backup, restore, uninstall drivers.


Why Driver Easy?

1~2~3~Done!!! All drivers are installed successfully!

Can’t you see? Driver Easy is quite easy to use, you can download all the latest device drivers with 3 clicks!
Are you still annoyed with your driver issues? Don’t be!
With the friendly user Interface, Driver Easy can save you so much time & energy in finding the latest drivers for your computer.
Powered by Industry-leading technology, 1,000,000+ hardware driver database, daily-updating drivers support, Driver Easy can make your computer faster and assure your system runs more safely & steadily.
It’s easy to backup every driver installed in your pc and restore it whenever you want. Further more , If you determine the old and new drivers incompatible, DriverEasy lets you easily Uninstall any Drivers that you do not need . In a few seconds you can clear up your system and keep the specified driver working quite well.
Do not know how to install the driver you already downloaded?
With our revolutionary Smart “Auto-Installation” technology, DriverEasy can even unzip the your downloaded driver, automatically install those drivers which does not include  Setup.exe. From now on, do not worry anymore complicated driver installatioin issues!
To enhance your “One-Click Installation” easiest user experience, we continually updating our Drivereasy Engine every day. Once own Drivereasy, you’ll be surprised to find that fixing driver issues is like to have a piece of cake.
Do your computer problems sometimes "drive you" to the scene of the "crash" too?!
Download DriverEasy Now. Just one touch! Your driver troubles will be eased!

windows 7 permenant activate for life time


Windows 7 Permanent Activator Loader extreme Edition v3.503

Windows 7 Permanent Activator Loader eXtreme Edition v3 Free Download Full version Crack Patch

Windows 7 Permanent Activator If you want a bit more features and control with Windows activation process, try this updated version of Windows 7 Loader eXtreme Edition by NAPALUM guy.

Description: Windows 7 Loader Extreme Edition |Ăť is a versatile tool to activate any version of Windows 7/ Vista/ 2008R2/ 2008. Interacts directly with elements of the operating system responsible for activation. It supports all the official ways to activate and removes a number of internal restrictions on their use. Provides an adequate level of security the user, allowing fearlessly make intuitive interaction with the activator. Able to perform all the basic functions of the individual tools used for activation.

Activates all Windows 7 versions:

Ultimate, Professional, Enterprise, Starter, Basic, Home, etc.

Activates Windows 7 / Vista / 2008 R2 / 2008 / Office 2010
Supported editions: All

Features:

Safer loader installation (than other activators)
Activate any edition (without reducing default activation abilities)
Activates Office 2010 (w7lxe.exe / office2010)
Trial Reset (get back 4 rearms and 30 days)
Installs/Uninstalls/Detects public SLIC emulators:
W7 Loader
Open W7 Loader
SLIC Driver
Vista Boot
WOW7 Loader
MBR SLIC Loader
Vista Loader
KMS Emulator
Automatic and Advanced Mode
Complete loaders collection

Ability to use external SLIC’s storage
Ability to use external Certificates storage
SLIC and Certificate comparison
Custom KMS servers list
Custom keys list
Custom logos list
KB971033 ready
Shows extended activation-related information.
Detects Chew-WGA & RemoveWAT-related system changes.
Activates Office 2010
Custom loaders integration
Windows activation information
SLIC checking: checksum, SLIC&RSDT&XSDT markers
Installed loader information: Boot Loader and SLIC Emulator
Installed key information
SLIC dump
Certificate dump
Product key checker
Logos and OEM information installation
Commmand line keys
Internal SLIC’s storage
Internal Certificates storage

KMS Activation:

Emulated KMS Server
Internet KMS Servers

Download latest updates:

Windows 7/Vista/2008R2/2008 keys
Windows 7 SLICs
Windows 7/Vista Certificates

Instructions:

- Run as administrator
- Click on “Activate Your Windows 7 Copy” and follow onscreen prompts.
- Done, Enjoy


DOWNLOAD NOW (MIRROR LINK)


Windows 7 Permanent Activator Loader extreme Edition v3.503

How to Run Android Apps on Windows PC [Best Android Emulators]

It’s a daily routine headache for Android developers and app makers to test their Android apps on Android devices. It’s not that easy to carry their sample builds to android device again and again and test them. This procedure takes time and in this fast moving World; time is money. To make Android apps run smoothly on Windows PC, I have collected some good tools. By using these emulators, you can run free and paid Android apps on your Windows PC. These emulators will help you to download and install Android apps directly from Google play store.
Note: First two tools(bluestacksyouwave) has the best compatibility with any Windows version, including Windows 8.1, 8, 7, Vista and XP.

Bluestacks:

Bluestacks is a light weight and wrinkleless tool, that is user-friendly and fast, as compared to other tools. You are just required to download this tool and run its setup and you are done. Click here to download bluestacks.
After downloading it open the zip file with any zip file extraction software like winrar and 7zip. After opening it, run the setup of bluestacks and the installation process will start. As you can see in the below screenshot.
Bluestacks setupClick on continue button and start the installation process.
Installing BluestacksNow you are required to enable synchronization with the app store and Google play store by signing in with your Gmail ID.
App store Sign-in
Sign-in to Play StoreNow app store and app sync are enabled and you can now browse app store.
Sync enabledNow you can install and run any app from Google play store as shown in the below images.
Google play store
Installing Temple Run
Playing Temple Run on PC

Youwave

Youwave is another tool to run Android apps on Windows PC easily. It’s not free of cost but you can get a 10 day trial of it. Youwave comes in two different versions, which are youwave basic and youwave home. The difference between them is the Android OS version. Basic version runs Android 2.3 gingerbread and home version runs Android 4.0.4 ICS. Download and install youwave android app player from here.
After installation process completion youwave’s window will open up.
YouwaveNow you are required to click on “view” tab and from the drop down menu select “Online content”. From the Online Content menu, click Google Play. It will download and install Google play it in few seconds.
Online content
Install Google PlayAfter signing in with your Gmail account, you’ll see the google play app store. And now can download and install any android app on your PC.
Subway Surfers on PCTip: You can run whatsapp on your PC, because youwave has built-in whatspp on it and you are just required to install it and start messaging.

Other Tools:

You can also run Android apps on your Windows PC, by using the official Android SDK tool for developers and genymotion. Both tools are good, but I wouldn’t recommend you to use these tools because of the below listed reasons.
Android SDK
  • Huge in size, almost half GB.
  • Needs Java platform to run the emulator.
Genymotion
  • Has compatibility issues with Windows’ PCs.
  • Registration is must, to download this tool.
I hope you will enjoy using bluestacks and youwave by using your favorite Android apps on your Windows PC.
- See more at: http://techzend.com/run-android-apps-windows-8-7-vista-xp/#sthash.Fodeu19l.dpuf

How to create your first Android app

This article will be the beginning of an AndroidPIT Android Development series.Knowing a programming language already will be very helpful to follow up with the tutorial but it’s not required.
Android development is mainly done in Java, which is the usual language used to teach programming in computer science courses. If you don't know Java but already know another language, you can easily pick up Java along the way.The development environment we're going to use is the new Android Studio which was announced during the latest Google Developer’s Conference (I/O 2013).
Our goal for this week's mini project is to create an app that displays "Hello AndroidPIT" on the screen of your Android device.
LV1A3278
© AndroidPIT

First steps

The first thing you need to do is to download Android Studio.
I’ll be using Ubuntu Linux for this tutorial, but you can also use Windows or Mac. You just need to adapt the instructions to your particular situation. Since I don’t use Windows or Mac, unfortunately, I can’t provide you with instructions.
Android Studio is written in Java and you are also going to write in Java for this tutorial so you need to install the Java Development Kit (JDK) also. Follow this link and download the version for your system:
We will deploy your “Hello” app directly into your phone. For that reason, you need to enable USB debugging on your device, which is only available if you have your device in developer mode.
To enable “Developer mode” you need to go to Settings > About phone and tap “Build number” until a toast displays that you're a developer. Then, in the previous screen you'll see a new entry called "Developer options" and there you should enable "USB debugging".

Creating your first Android project

So, assuming that you have already installed Android Studio, let’s create a new project. I’ll use screenshots to make it easier for you to follow up with the steps.
pi
© AndroidPIT
We’re going to name our project HelloAndroidPIT. Module name, Package name and Project Location get filled in automatically and you don’t need to change them.
What we’re going to change is the minimum required SDK to API 15 (Android 4.0.3 IceCreamSandwich). Yes, we’re going to ignore Android 2.3 (API 8) which will hopefully die by mid-2014. I know that currently Android 2.3 still has 26.3% of market share, but I’m confident that it will start dropping very quickly after Christmas. If you want to know more about the percentage of users each Android version has, please consult this page.
Our target SDK will be KitKat and you can choose either Java 6 or 7. Support for Java 7 is very recent and some features are only available if your minimum required SDK is 19. Which won’t happen soon probably.
Since we’re not going to create a custom icon, please uncheck that checkbox.
After pressing next, you’ll see this screen:
pi1
© AndroidPIT
Just press Next again and you’ll see another screen…
Ignore all those fields and just press Finish.
After completing these steps, connect your device to your computer, press the green Play button and the auto-generated code should compile, get deployed to your device and run.
Now that the app is running it should display “Hello world”. Saying hello to the world is nice, but we'll say hello to AndroidPIT also.
pi4
© AndroidPIT

Hello AndroidPIT

Now, to say hello to AndroidPIT you just need to open the strings.xml file inside your values folder which is found inside your res folder. You should see the string there which says “Hello World!”. Simply change it to Hello AndroidPIT and press Play again.
pi5
© AndroidPIT

Localization (L10n)

Localization (usually abbreviated to L10n) is very important nowadays. We're not in the age where software was only available in English anymore, so it's important to know how Android deals with L10n.
Since I'm from Lisbon, Portugal, living in Berlin, Germany but speaking English everyday at the office (yes, German is not easy to learn), we will learn how to say “hello” in all those three languages.
If you look to your values folder in your project you see that there is a strings.xml file there.
To add other languages you just need to add a values folder followed by a dash and the codename of the country to your res folder inside your project, for example: values-pt and values-de. Copy the strings.xml file from the default values folder to each of those two folders and then edit each of those files and replace “Hello AndroidPIT” with “Hallo AndroidPIT” and “Olá AndroidPIT” for German (values-de) and Portuguese (values-pt) respectively.
If you change the language on your device and run the app again, you should see the app translated.
I hope that this tutorial has made you excited to learn about Android development. The next article that I might possibly write will be about displaying how to display AndroidPIT news articles. What do you think about that?
Please let me know if you liked the article in the comments below.

creat proffesional website in 10 minutes

The article, Creating a website with Artisteer, helps you develop a good-looking, professional website using Artisteer without the need to learn programming languages. This article byJakub Sanecki, author of Creating Templates with Artisteer, explains the process of designing templates for websites using Artisteer.
(For more resources related to this topic, see here.)

Layout

The first thing that we should set up while designing a new website is its width. If you are interested in creating web pages, you probably have a monitor with a large widescreen and good resolution. But we have to remember that not all of your visitors will have such good hardware. All the templates generated by Artisteer are centered, and almost all modern browsers enable you to freely zoom the page. It's far better to let some of your visitors enlarge the site than to make the rest of them use the horizontal scroll bar while reading.
The resolution you choose will depend on the target audience of your site. Usually, private computers have better parameters than the typical PCs used for just office work in companies. So if you design a site that you know will be viewed mostly by private individuals, you can choose a slightly wider layout than you might for a typical business site. But you cannot forget that many nonbusiness websites, such as community sites, are often accessed from offices.
So what is the answer? In my opinion, a layout with a width of 1,000 pixels is still a good choice for most of the cases. Such width ensures that the site will be displayed correctly on a pretty old, but still commonly used, nonwide 17'' monitor. (The typical resolution for this hardware is 1,024 x 768 and such a layout will fill the whole screen.) As more and more users have now started using computers that are equipped with a far better screen, you can consider increasing the resolution slightly, to, for example, 1,150 pixels. Remember that not every user will visit your site using a desktop. Many laptops, and especially netbooks and tablets, don't have wide screens either.
Remember that the width of the page must be a little lower than the total resolution of the screen. You should reserve some space for the vertical scrollbar.
We are going to set up the width of our project traditionally to 1,000 pixels. To do this, click on the Layouttab on the ribbon, and next to the Sheet Width button. Choose 1000 pixels from the available options on the list.
The Sheet Options window is divided into two areas: on the left you can choose from the values expressed in pixels, while on the right, as a percentage. The percentage value means that the page doesn't have a fixed width, but it will change according to the parameters of the screen it is displayed on (according to the chosen percentage value). Designing layouts with the width defined in percentage might seem to be a great idea; and indeed, this technique, when properly used, can lead to great results. But you have to remember, that in such a case, all page elements have to be similarly prepared in order, to be able to adapt to the dynamically changing width of the site. It is far simpler to achieve good results for the layout with fixed values (expressed in pixels).
It is a common rule while working with Artisteer that after clicking on a button on the ribbon, you get the list containing the most commonly used standard values. If you need a custom value, however, you can click on the button located at the bottom of the list to go to a window where you can freely set up and choose the required value. For example, while choosing the width of a layout, clicking on the More Sheet Widths...button (located just under the list) will lead you to a window where you can set up the required width with an accuracy up to 1 pixel.
We can set the required value in three ways:
  • We can click on the up and down arrows that are located on the right side of the field.
  • We can move the mouse cursor on the field and use the slider that appears.
  • We can click on the field. The text cursor will appear. Then we can type the required value using the keyboard. For me, this is the most comfortable way, especially since the slider's minimal progress is more than 1.
Panel mode versus windows mode
If you look carefully at the displayed windows, on the bottom-right corner you will see a panel mode button. This button switches Artisteer's interface between panel mode and windows mode. In the windows mode, the advanced settings are displayed in windows. In the panel mode, the advanced settings are displayed on the side panel located on the right side of Artisteer's window. If you are using a wide screen, you may find the panel mode to be more comfortable. Its advantage is that the side panel doesn't cover anything on your project, so you have a better view to observe the changes. Such a change is persistent and if you switch to the panel mode, all the advanced settings will be displayed in the right panel, as long as you decide to go back into the windows mode. To reverse, find and click on the icon located in the top-right corner of the side panel (just next to the x button that closes the panel).

Summary

This article has covered some features exclusive to Artisteer. It has also explained a brief process of how to create stunning templates for websites using Artisteer.

Resources for Article :


Creating Templates with ArtisteerDesign professional-looking websites and CMS templates, on your own!
Published: March 2013
eBook Price: $14.99
Book Price: $24.99
See more
Buy It Now

Make Money With Facebook & Twitter in Pakistan

Make money online in  Pakistan is not easy as its looks lots of programs are scamming with poor people and asking to them registration fee till them secret of earning money with Facebook & Twitter in Pakistan,  Now I am going revealing the secret where you can earn money by just liking Facebook pages & following people on twitter it is simple as every can do this jobs on there free time. yes every body can join this free.

                                   Steps to Start Making money  
                             1) Create an account free by Click Here
                             2) Connect your Facebook & Twitter account.
                             3) Go to your account see picture below.
Earn money with Fansalave in Pakistan   
Fansalave is most popular program at this time so don't waste you time just join and start making money, As the first provider in the world allows you to make money with your social networking sites After the successful registration, you can click through the pages of the FanSlave network. Note: if you cannot see any fb page to like then keep refreshing your my account area. Remember don't  make multiple accounts. If you like the page, you get credits for your efforts, which you can cash out after reaching the minimum payout of € 15 via Payza. If you don't have Payza account so Create Payza account for free.

click and get 20$ per day

 
Blogger Templates